Showing posts with label home-made present. Show all posts

Wednesday, 3 July 2013

Iced Biscuits

I have made these biscuits time and time again and they come out perfect each time. My piping on the other hand is a different story... The icing itself was of a good consistency it is just my piping that needs more practice. If I am honest with you this is the first time that I have done this sort of piping so when I look at the biscuits in that light, I feel relatively happy with them.

I went for pastel colours

Iced Biscuits

Ingredients:

For the Biscuits:
>125g Butter softened
>3/4 cup sugar
>1tsp vanilla essence
>1 egg
>2 cups plain flour
>1tsp baking powder

For the icing
>250g icing sugar
>The white of 1 large egg
>Drops of lemon juice
>Food colouring (optional)

Method:
1. Preheat the oven and line a baking sheet.

2. Cream the butter, sugar and vanilla essence together until light and fluffy.

3. Add the egg and beat well.

4. Sift the flour and baking powder together and mix into the creamy mixture.

5. Roll out the biscuit dough to about 1/2cm thick and cut out biscuits using cookie cutters. Transfer the biscuits to the baking sheet.

6. Bake for about 9 minutes, slightly longer if your biscuits are bigger or thicker. Bake until the biscuits are golden brown.

7. Take the tray out and leave the biscuits to cool on the tray for a couple of minutes and then transfer the biscuits to a cooling rack.

8. In a bowl add the icing sugar, egg white and lemon juice together. If your egg white is not enough then you may have to crack open another egg and use part of that egg white. Beat the egg white and sugar  together for about 5 minutes until you have stiff peaks.

9. Add a couple of drops of water to the icing so that it is easier to pipe. Split the icing into as many colours as you would like and stir in the food colouring.

10. Transfer the icing into piping bags and pipe decorations onto the cookies. Leave the cookies on a cooling rack so that the icing hardens.

11. Serve and enjoy!


Wednesday, 26 June 2013

Chocolate Chip Cookies

Just a quick reminder before I start, in a couple of days Google Friends Connect is closing down and if you would still like to follow this blog then the way to do so would be through Bloglovin. The link to my page is here.


I found it too hard to stop myself from eating the cookie dough. It was just too good! If I am completely honest with you, I probably ate somewhere around 2 cookies worth. Shhhhh!

Cookies and milk, perfect!

Now, onto the recipe. I have been dying to share this recipe with you since the start of this blog and I cannot believe it has taken me so long to get around to it! I finally found some time yesterday and this is the result! These cookies can be made days in advance and stored in a air-tight container.

This recipe is so simple and I have made it several times and each time this recipe has not failed me. the thing that I love about this recipe is that you do not have to chill the mix so this recipe is super quick.

Chocolate Chip Cookies

Ingredients:

> 250g self-raising flour
> 1/2tsp bicarbonate of soda
> 1/2tsp salt
> 170g unsalted butter
> 170g soft, light brown sugar
> 70g caster sugar
> 1tbsp vanilla extract
> 1 egg
> 1 egg yolk
> 300g chocolate chips (plain, milk, dark, white, whichever you wish!)

Method:

1. Preheat the oven to 170C. Line a baking tray with baking paper.

2. In a bowl sift together the flour, bicarbonate of soda and salt. Set the bowl aside.

3. Melt the butter. The best way to do this is in the microwave. Watch the butter like a hawk and make sure the butter is just melted and not boiling.

4. In a medium bowl, using a wooden spoon, cream together the melted butter and sugars. Beat in the vanilla and the eggs until light and creamy.

5. Mix in the sifted ingredients and stir in the chocolate chips. Place 1 tablespoon of the cookie mixture onto the baking tray. The cookies spread a lot in the oven so leave a fair amount of space between the cookies.

6. Bake in the oven for 12 minutes. The cookies should be lightly golden but still soft. Take the tray out and leave the cookies on the tray for 1-2 minutes to harden slightly and then move the cookies onto a cooling rack. You will find that you will have to bake several batches and end up with about 36 cookies, that is if you don't eat any!

7. Serve the cookies with a glass of milk and if you do not wish tho consume the cookies on the same day then simply store them in an airtight container until you are ready to serve them.

8. Heaven!


Monday, 11 March 2013

How to make Chocolate Truffles

I realise now that I haven't quite got the hang of this blogging aspect yet and so if I want to do tutorials for a certain day then I have to make them in advance to give you time to make them. So, it is lucky then that chocolate truffles can be made for any occasion.

These chocolate truffles are really easy to make and they look very impressive. I have experimented with a few toppings and fillings but you can use anything you fancy.

Ingredients:

  • 1/2 cup of double cream
  • 2tbsp caster sugar
  • 1tsp vanilla essence
  • 170g plain chocolate or dark chocolate
  • 30g unsalted butter at room temperature
  • Cocoa powder for rolling in and anything else such as chopped pistachios or chopped almonds
Method:
  1. If you are using block chocolate then roughly chop the chocolate. Chop the butter and add with the chopped chocolate into a bowl.

Chocolate chips and chopped butter
2. Add the double cream, sugar and vanilla into pan and boil on a medium heat until the cream is boiling.
Double cream and sugar
3. Once the cream has boiled add to the chocolate and butter mixture and mix, slowly at first. Mix until smooth. If you are planning to add any extra ingredients such as chopped raisins or cherries then now is the time.
Melted chocolate

4. Leave the chocolate mixture in a cool place for at least 45 minutes.
5. Add the chocolate mixture into a piping bag. If you have added extra ingredients then make the hole bigger so that you won't have trouble with blockages.
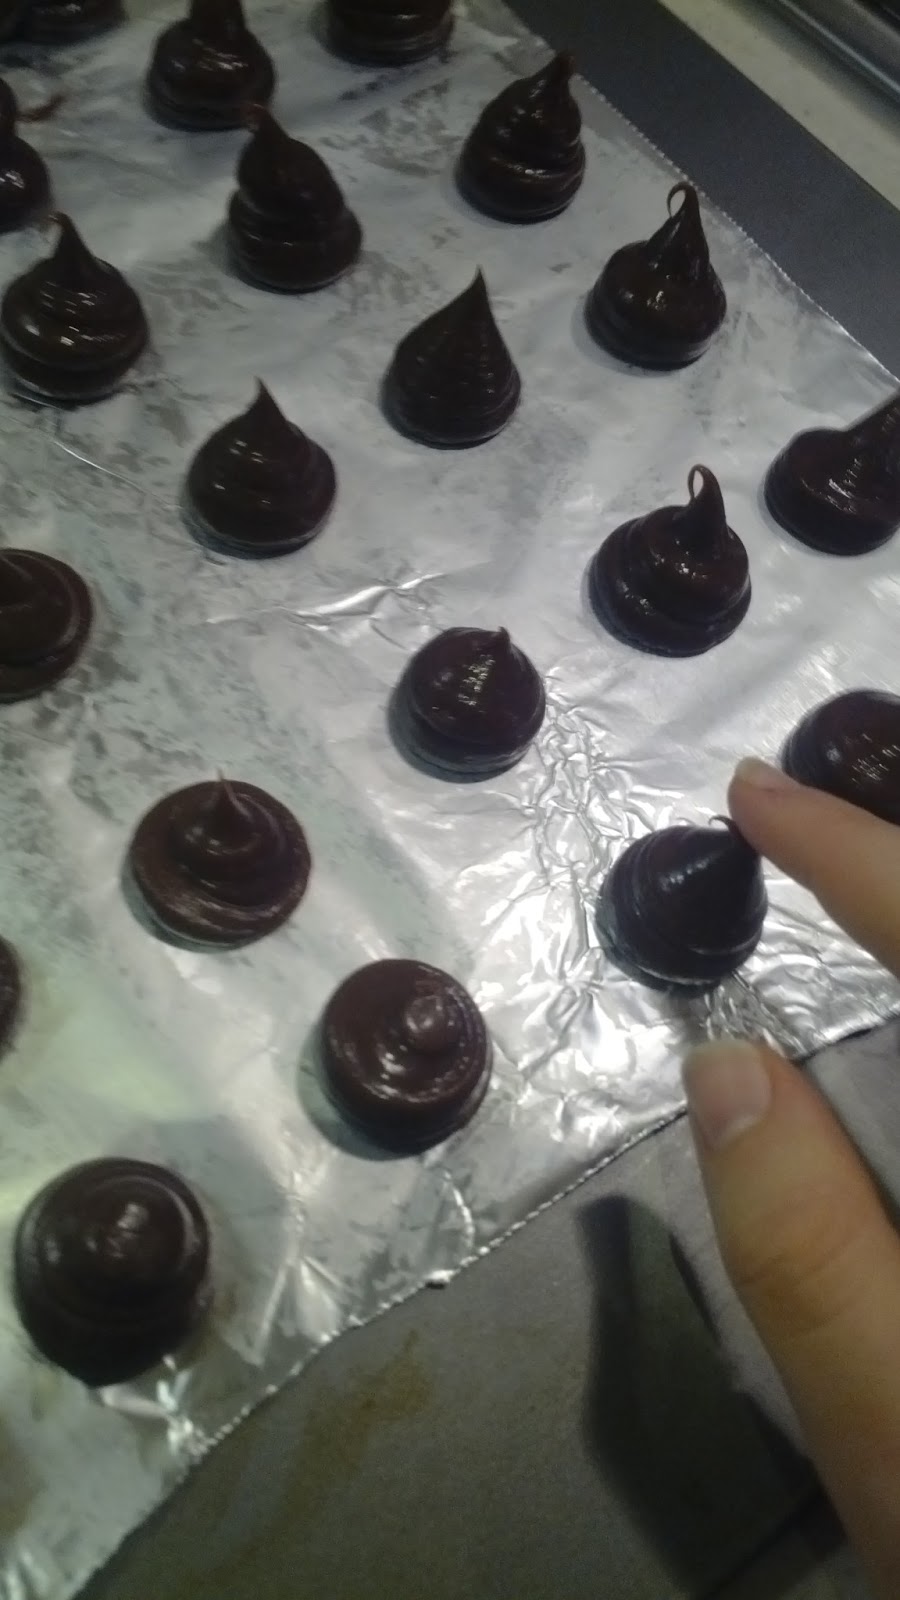
6. Place a piece of baking paper onto a baking tray. I ran out of baking paper and so used foil and buttered it which worked just as well. Pipe chocolate mixture onto the tray. You can make them as big or as small as you want them to be. 
Piped chocolate truffles
7. My chocolates had pointy tips and so I smoothed these over with a damp finger. Make sure that you finger is damp not wet as this will ruin the chocolate otherwise.
Piped chocolate truffles

8. Leave the truffles in a cool place for at least 45 minutes. The longer you can leave them the better.
Rolling chocolate truffles
9. Wearing rubber gloves to stop them sticking to your hand roll the chocolate truffles until they are smooth and then roll them in anything you like. 
Chopped pistachios
I rolled some truffles in chopped pistachios.
Sultana stuffed truffles
I made some hidden inside truffles as well. To do this I pushed a raisin into the middle of each chocolate 'dome' and then rolled them as normal.

To serve I placed the truffles into mini cupcake cases and then a box. Once finished, place the truffles into the fridge.
Variety of chocolate truffles
Please feel free to leave comments. I will be more than happy to answer any queries.

Evelyn
  xxx